
As is sometimes the case, I'm writing this post primarily for my own future reference.
Dendrite is a development environment that allows you to work with tokens for commonly-used blocks of text when hand-coding a site. Further to that, it gives you simple dialogs for special blocks with structured text and images, known as 'cards'.
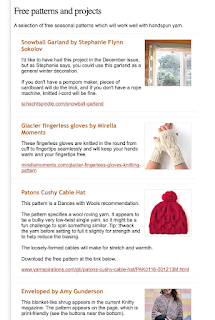
There's a block of code near the top of this page, which generates a feature image. This is the code:
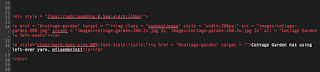
Each month for some years I've created the resized images and edited this code manually, because that's less effort than remembering how to set up a new template for a custom card in Dendrite.
So today I've gone to the trouble, and have also gone to the trouble of documenting it here for you and for myself.
This text only appears once on the page, but the real benefit is being able to use the 'insert card' dialog to paste the image and write the caption. Turning multiple fiddly copy-and-paste operations into a few slick and mindless strokes.
So here's the procedure. You're welcome, future-me.
Adding a new template to a Dendrite website
First copy one of the existing default templates, found in <website folder>/Templates. (use 'News' because that one uses all of the tokens, which will serve as a temporary reference). Change its name to something memorable (In this case, FeatureImage.txt)
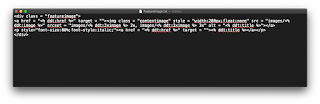
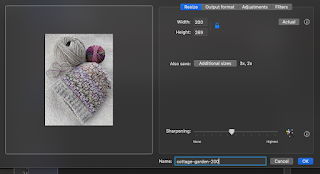
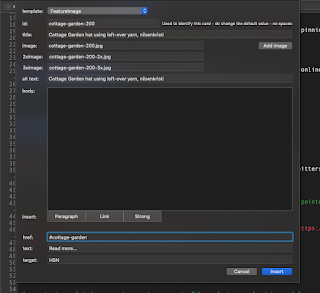
With that in place, Insert Card in Dendrite offers this dialog, which you can use to fill in the information, and Add Image allows you to paste the image (past it once, Dendrite can create the 2x and 3x versions. All you have to do is give it a base name, which also serves as the id for this particular object.)
Important things to remember
- Remember to select your new template before OKing this card dialog (the drop-down button at the very top of the Insert Card dialog.) I think it defaults to 'News' rather than the last one you chose.
- If you use a different image format (as I do here, 200w and locked proportions rather than 150x150 for the regular news stories) remember to make sure those settings are right for this special card and future regular ones.
No comments:
Post a Comment